Showing posts with label Functional training. Show all posts

Wednesday, September 16, 2015

The Ultimate Shoulder Endurance Exercise

personal training clifton

The ShoulderBurner.


One of my favourite #bootcamp creations.

Total body training focusing on shoulder endurance, core (torso stability) and the #cardiovascular system.

Can be performed indoors or outdoors. You will need 10m of clear space to run.

Dumbbell weight 70 to 80%rep max. 


Standing Shoulder Dumbbell press
Standing with slight bend in knees core switched on, chest up, eyes on horizon. Breathe in on the way down out as you press up. Elbows slightly forward as you bring dumbbells down.

Fit Ball Run
Run/jog with fit ball above head. Slight bend in elbows, core switched on, chest up, eyes on horizon.

Start;

Standing shoulder dumbbell press

  1. 1min Then 20m run with fit ball above head.
  2. Next, 45sec shoulder press 40m run with fit ball
  3. Next, 30sec shoulder press 60m run with fit ball
  4. Last, 15sec shoulder press 80m run with fit ball.


Done.

Personal Training Clifton
www.rlbodytrainer.co.uk

Thursday, January 22, 2015

Functional Training 101

Personal Training Clifton

Personal Training Clifton

( I wrote this article for a New Zealand fitness mag in 2002 long before I had heard about training systems like crossfit. I missed that boat)

The Advantages of Doing Functional Compound Sets

We are more often looking towards the gym to help give them that edge during sports. There is also a greater desire to achieve the lean athletic look of a sportsperson, without a large increase in muscle mass as seen in bodybuilding athletes. If you want to look like an athlete then it helps to train like one. This article explains how using one technique called ‘Compound sets’ has benefits over traditional weight training, especially when the desired goal is functional performance. You might have heard of compound exercises this is where more than one joint is involved in a single movement (i.e., bench press or squat). A compound set is simply when two or more exercises are involved in a single set.

A large number of traditional weight training exercises originate from a bodybuilding background, which focuses on growth and symmetry of individual muscles or body parts. With this style of training, isolation of joints and muscle groups (i.e., bicep curl or hamstring curl) will occur. If your goal in the gym is for functional athletic performance or weight loss there are three main drawbacks with traditional weight training.

Training the nervous system is highly specific. Isolating body parts as seen in many traditional weight-training exercises will adapt the nervous system to be more efficient at isolated movement. If you train the nervous system to isolate individual muscle groups it will decrease it’s ability to coordinate muscle groups into complex movements such as jumping or throwing a ball. Using compound sets will train the nervous system to coordinate between multiple muscle groups and to achieve a greater number of complex movement patterns. This closely resembles the athletic demands placed on our coordination during sport.

Traditional weight training split programmes causes a short-term muscle imbalance within the body. Fatiguing one muscle group without fatiguing the opposing muscle group creates this muscle imbalance. Research has found the knee is more susceptible to injury if there is an imbalance between quadriceps and hamstring strength, e.g. if you train quadriceps on one day and then hamstrings another day. A well-designed compound set will work the body as a whole and is less likely to cause the body these short-term muscle imbalances.

Boxing personal Training clifton
A large number of sports require an intermittent maximal effort, which places great demands on the anaerobic system. Sports such as netball, tennis, squash and many other sports played in New Zealand require short bursts of sprinting with small rest periods in-between. The greater number of muscles being used at once means a greater amount of energy is required. Heavy load compound sets tend to be more demanding on the anaerobic system because of the larger number of muscles required to complete the exercise. When weight loss is the goal, compound sets can burn more calories for the same amount of time spent on a set. Traditional weight training exercises tend to use a smaller number of muscles during each exercise and therefore burn fewer calories.

The Training Programme

Compound sets should not be used if you have very little or no weight training experience. A six-week conditioning programme designed by a qualified instructor should be completed before introducing compound sets to your workouts. Before using compound sets, practice the individual exercises first. A range of tempos can be used during the sets. It is advised to start with slow tempos until the individual feels fully competent with the complex movements.

Follow this programme for no more than four weeks or add these compound sets to an existing programme.

Weight training 2 - 3 times per week. One day on, one day off. 2-3 days per week do cardio and core-stability (Abdominal and lower back).

Example: 4 Week programme

Sets Reps Load Rest
Week 1 2 15 Light 90
Week 2 3 12 Medium 60
Week 3 3 12 Medium 60
Week 4 4 10 Heavy 45

bootcamp personal training bristol
Compound Sets:

1. Burpee-out, Press up (Knees or Full), Burpee-in, Power-clean, Push press (Using Dumbbells)

Starting Position
Place dumbbells shoulder width apart with the handles parallel to each other.

Burpee-out.
Grip dumbbells shoulder width apart, keep back and neck in neutral position. Keep abdominals strong, burpee out to press up position

Press up.
Start press up at full position or move to knees. Keep back and neck in neutral position throughout entire press up.

Burpee-in.
If press-ups were preformed on knees return to full position. Burpee in toward barbell and adjust to starting power clean position.

Power-clean.
Feet should be between hip and shoulder width apart, toes forward and slightly outward. Standing with back rigid and flat or slightly arched. Simultaneously fully extend the lower extremity joints and quickly shrug shoulders. Pull arms as high as possible. After the lower body has fully extended and the bar reached near maximal height, pull the body under the bar by rotating arms and hands. The bar should be caught across the shoulders.


Push-press
Bend the knees slightly as if starting a squat then explosively push the dumbbells up using your calves, legs and arms. Finishing in a shoulder press position. Keep your abdominals strong throughout the movement and be careful not to hyperextend the lower back.

Finishing
While maintaining a flat back slowly flex the hips and knees and lower the dumbbells to the starting position.


2. Hang Clean, Front squat, Push Press

Starting Position
Feet should be between hip and shoulder width apart, toes forward and slightly outward. Standing with back rigid and flat or slightly arched. Bar resting slightly above knees

Hang Clean
Simultaneously fully extend the lower extremity joints and quickly shrug shoulders. Pull arms as high as possible. After the lower body has fully extended and the bar reached near maximal height, pull the body under the bar by rotating arms and hands. The bar should be caught across the shoulders.

Front Squat
Feet should be between hip and shoulder width apart, toes forward and slightly outward. Keep elbows high, eyes on the horizon and the chest up. Move with hips first then knees. Squat as if sitting into a chair, keeping the abdominals strong. Stop decent if the heels start to rise or the pelvis tilts backward. Stop when the thighs are parallel to floor.

Push press
Start push press halfway through up phase of the squat. Explosively push up the dumbbells up using calves, legs and arms. Finishing in a shoulder press position. Keep the abdominals strong throughout the movement and be careful not to hyperextend the lower back.

Finishing
While maintaining a flat back slowly flex the hips and knees and lower the dumbbells to the starting Hang clean position.


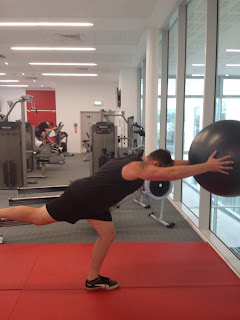
3. Backwards Lunge with barbell, High knee.


Start
Stand with barbell in finished shoulder press position. Hand position should be wider than the shoulders. Arms should be straight, do not lock out elbows (this exercise should be started with the weakest side first and the same amount of reps preformed on both sides).

Backwards Lunge
Perform a backwards lunge while keeping barbell in fixed position. Keep feet parallel and hips facing forward throughout the entire movement. Keep eyes on the horizon and the chest up throughout the exercise.

High Knee
Return to starting position. Then, using the same leg used in the backwards lunge, lift the knee as high as possible while maintaining a neutral back position.

Finishing
Once the knee has reached maximum height the cycle should then repeat by starting a backwards lunge again.

Personal Trainer
M: 07511468490
E: rlbodytrainer@gmail.com
Twitter: @LesmillsPT

Saturday, November 8, 2014

What is Human Balance?


Balance Personal Training Clifton
Balance is referred to as an individual’s ability to produce and maintain a stable posture. Although balance is not the main focus of most individuals training goals it has a great importance to everyday life. According to the ACC 2015 statistical data, falls are the most common injury in older adults. Many factors can cause the elderly to fall but the underlining cause is a lack of ability to balance. Not only can these injuries have long lasting effects, such as loss of mobility for the individual, but in some cases cause death. Most sporting situations require a degree of balance for success. Not only will increasing balance improve an athletes sporting performance but will also decrease the chance of injury caused by loss of balance during sport.

An individual’s ability to balance is affected by two main areas, sensing change in body position and the ability to affect change in body position. There are three systems used within the body to sense change in position, vestibular (inner ear), visual (eyes), and somatosensory (soma = body, sensory = sensations). The vestibular system is found in the inner ear, it senses change in motion and position of the head. The visual system provides information to the brain on the body’s position in respect to the external world. The somatosensory system is responsible for conveying sensory information from the skin, muscles and joints to the brain. All three systems are used in combination to help the body balance.

The ability to change body position, in order to maintain posture, can be controlled actively by thinking about it or passively without thought. Our bodies usually use a combination of the two. The nervous systems postural reflexes control posture passively (sub-consciously). The body’s muscles and nervous system are used to actively control body position; an example would be changing arm position when balancing on one leg.

When your goal is to improve your balance you must improve both your ability to sense change and your ability to affect change in the body’s position. There are many techniques used for improving balance such as exercising while standing on one leg or performing exercises with your eyes closed. In this article we will look at just one technique, overloading both the somatosensory system and the muscles controlling balance. To improve a physical ability you can overload (make its job harder) than normally experienced.

Balance personal Training clifton A good technique, when training for improvement in the somatosensory system, is to increase the demand on the system by making the base of support (i.e. the floor) unstable. The most common pieces of equipment used in the gym are the swiss ball or the wobble board which both work in two ways. Firstly by creating an unstable base of support making it harder for the body to sense change in position relative to the ground which then increases this system’s ability to work during normal situations. Secondly, making it harder to change the body’s position by not having a solid platform to push against, this helps to increase strength and stability of the muscles concerned with control of balance. This is especially important for older adults when lack of muscle strength is a key factor in causing falls.


personal Training Bristol
The Balance Exercises

The following exercises can be used in addition to an individual existing exercise programme. If you have any known physical or medical conditions see your doctor for clearance before commencing these exercises. If possible have a qualified instructor check your technique.

The Wobble Board

A wobble board is usually a disc shaped board with a smaller dome on the base creating an unstable platform, although they do come in many shapes and sizes. An air-filled plastic wobble board with a wooden disc for stability was used for the following example. The wobble board has been widely used by physiotherapists for rehabilitation of lower limb injuries. It can be used to help improve the nervous system and stabilizing muscles. Within gyms the wobble board has been used more and more in a range exercises such as squats, lunges and press-ups to help improve balance and create variation from traditional techniques.

Wobble board squat and one arm shoulder press is an excellent exercise for improving balance while still completing a resistance style exercise. You should do the exercise at the start of your programme when your nervous system is fresh. Because the exercise uses a large number of muscle groups it is great for warming up the entire body.

The Swiss Ball

The swiss ball is widely used for improving strength, increasing muscle tone, increasing flexibility and in this case improving balance. The same principles for improving balance with the wobble board apply to the Swiss ball.

Swiss ball balance exercises can be preformed at the start of an exercise programme to warm-up or at the end of a programme as a cool-down. Make sure there are no objects or obstructions within a falling radius that may cause injury. When you have mastered the level 1 exercise by completing 2-3 sets with good technique for 1min, move on to the next level.


Wobble board squat with one arm medicine ball shoulder press.

Starting position
Place wobble boards shoulder width apart. Use a 1-6 kg medicine ball depending on strength. Stand on wobble boards with medicine ball in left hand at shoulder level.

Down phase of the squat (left arm shoulder press)
Feet should be between hip and shoulder width apart, toes forward and slightly outward. Keep the medicine ball steady at shoulder level, eyes on the horizon and the chest up. Move with hips first then knees. Squat as if sitting into a chair, keeping the abdominals strong. Stop descent if the pelvis tilts backward or when the thighs are parallel to floor which ever comes first.

Up phase of the squat
Start the one arm shoulder press halfway through the up phase of the squat. Keep eyes on the horizon and the chest up throughout the movement. At the completion of the squat and shoulder press transfer the medicine ball to the right hand.

Down phase of the squat (right arm shoulder press)
Repeat steps taken for the left arm.

Up phase of the squat
As before, start the one arm shoulder press halfway through the up phase of the squat. Keep eyes on the horizon and the chest up throughout the movement. At the completion of the squat and shoulder press transfer the medicine ball to the left hand

Swiss ball balance exercise.

Level 1: Four point stance

Mounting the ball
Start in an open area with a flat level surface. Place knees shoulder width apart against the ball. Place hands slightly outside the line of your knees on the opposite side of the ball. Slowly transfer your weight over the ball until you are balancing on top of the ball.

Holding the exercise
You should have four-point contact with the ball using both hands and knees. Keep back and neck in neutral position during exercise. Draw bellybutton towards spine to keep abdominals strong. Hold position for up to 1 min.


Dismount
Slowly move your body weight backwards off the ball until your feet make contact with the ground.

Level 2: Three point stance

Holding the exercise
The same technique is used for mounting and dismounting the ball in three-point stance as in four-point stance. There is a difference when holding the exercise. Once four-point stance is reached, slowly raise your right arm until it is inline with your back. Keep neck and back in neutral position. Hold for half the time of the total exercise then slowly return to four-point stance and raise the left arm.

Level 3: Kneeling on the Swiss ball
Start with same technique as four-point stance. Then slowly rise up to a kneeling position with arms out parallel to the floor for balance. Keep eyes on horizon and chest up.

Level 4: Kneeling on the Swiss ball with one arm medicine ball fly
Start in the kneeling position on the Swiss ball. When you have reached a stable position with out stretched hands raise a 1kg medicine ball in front of you. Slowly move the ball in one hand out to the side until it is inline with your body then slowly move the ball back into the middle. Grab hold of the ball in the opposite hand and repeat step. Continue with movement until set is over.

Personal Trainer
M: 07511468490
E: rlbodytrainer@gmail.com
Twitter: @LesmillsPT

Thursday, January 5, 2012

Weight Training & Fat Burning

The winter months have a habit of adding a few extra kilos of bodyfat. With summer approaching and the thought of having to show your body to the world. Decreasing bodyfat may be your main training focus during the next few months.

There are many factors to consider when reducing bodyfat including: nutrition, cardiovascular training and resistance training. Two questions often asked are will weight training make me look like a bodybuilder and what type of resistance training should I do?

Resistance training is often misunderstood and ignored by women due to a fear of building to much muscle. In fact, for most women, to gain the large amounts of muscle needed for female bodybuilding is a most challenging and difficult task. The physical state reached by a female bodybuilding competitor usually takes years of specific training and the completion of a strict nutritional plan. The main reason why most women find it difficult to gain a large amount of muscle is there inability to produce a large amount of testosterone. Testosterone helps stimulate muscle building and the secretion of human growth hormone which in turn helps to increase muscle mass. Women produce on average one tenth the amount of testosterone than that of men. There are however several other hormones involved in building muscle, and the benefits of increasing muscle for the regulation of body fat demands that resistance training be apart of a weight control programme.

There are two main reasons why resistance training is an essential part of a balanced fat loss programme. Firstly, increasing muscle mass increases basal metabolic rate (BMR). Secondly, the calorie burning affect during a weight training workout.

BMR is the amount of energy required by your body to sustain its vital functions in a normal state. In English this means, the amount of calories your body burns to stay alive. If you increase your lean muscle mass you increase your BMR. Even with a small increase in lean muscle mass the body will increase the amount of calories burnt in a resting state e.g. 3kg increase in lean mass muscle = an extra 45 calories burnt per day.

Although 45 calories sounds like a small amount this equals over 16000 calories per year. Also consider the amount of calories burnt while performing the resistance training to gain the extra 3 kg of muscle. Although resistance training has a lower caloric expenditure than activities such as jogging or cycling, a 70kg individual will burn 350Kcal per hour while weight training.

A resistance programme for fat loss should focus on the following. Complex exercises such as compound sets and multiple task exercises (e.g. Power cleans, squats and lunges with bicep curls). Targeting larger muscle groups will not only produce a greater caloric demand but will also help with the functional aspects of your nervous system, such as coordination. Rep ranges of 15-20. Stay away from the muscle building zone of 8-12 rep range until you start to lose body fat. This is usually the cause of women feeling bulky from weight training and can be avoided by losing body fat before gaining muscle. Keep intensity high. If you are only going through the motions of a workout your body will not adapt to an increase in demands, which means limited results. Finally, change your programme at regular intervals. Keep your mind and body challenged, variation will place greater physical demands on your body and stop you getting bored.

The Exercise Programme

Before commencing this programme seek clearance from a medical practitioner. A six-week conditioning programme designed by a qualified instructor should be completed before commencing this programme.

The following programme is an example of an all-over body resistance programme. The main focus of this programme is to combine many muscle groups in single exercises. The programme should be followed for no more than 4 weeks. After completion, seek help from a qualified instructor or personal trainer for a change of programme.

The following programme should be completed 3 times per week. One day on, one day off. Aerobic training (20-40min) and core-stability training (abdominals and lower back) 2-3 days per week. A warm-up of 5-10 min cardio should be completed at the start of the workout. A warm down and full body stretch session should be completed at the end.


The Resistance Programme

Twist knee squats 3 15-20 Med Slow 60sec
Knee lift backwards lunge bicep curls 3 15-20 Med Slow 60sec
Burpee press up 3 Max B/weight Slow 60sec
Bent over barbell row 3 15-20 Med Slow 60sec
Bench dips with swiss ball 3 Max B/weight Slow 60sec


The Exercises

Do not hold your breath, breath out on exertion. Select a load suitable for the rep range. Maintain technique throughout exercise, once you lose your technique stop!

1. Twist Knee Squats
Starting position
Start with feet wider than shoulder width, toes forward and slightly outward. With a wide grip hold the barbell above the head. Arms should be straight, do not lock out elbows. Keep elbows directly under the bar, eyes on the horizon and the chest up.

Down phase
Move with hips first then knees. Squat as if sitting into a chair, keeping the abdominals strong. Stop decent if the heels start to rise or the pelvis tilts backward. Stop when the thighs are parallel to floor.

Up phase
Drive through your heels using your glutes and quads. Keep eyes on the horizon, abdominals strong and the chest up throughout the movement. During up phase lift right knee up and across the midline of your body. When you reach the top of the exercise slowly lower your foot down to the starting position. Repeat exercise using the left knee.

2. Knee lift backwards lunge and bicep curls
Starting position
Start with the left foot on the box (Larger box = increased intensity)

High knee lift + Bicep curl
Lift the right knee as high as possible while maintaining a neutral back position. At the same time perform a double bicep dumbbell curl. Return foot to standing position.

Backwards Lunge + Bicep curl
Perform a backwards lunge with the left foot and a double bicep dumbbell curl. Keep feet parallel and hips facing forward throughout the entire movement. Keep eyes on the horizon and the chest up throughout the exercise. Return to starting position. Perform all reps on right side then repeat number on left.

3. Burpee Press-up
Starting position
Start in a press-up position with hands on a workout bench. Feet and hands are wider than shoulder width apart. Keep the back and neck in a neutral position throughout the entire exercise.

Burpee-in
Burpee in toward bench while maintaining a neutral back and neck position

Burpee-out
Without pausing Burpee out to the starting position


Press up.
Keep back and neck in neutral position throughout entire press up.

4. Bent-over Barbell Row
Starting position
Start with feet shoulder with apart. Hold the barbell with a reverse grip shoulder width apart. Bend at the hips while keeping the back and neck in a neutral position. Hold barbell just above knees.

Up-phase
Pull barbell up toward stomach while keeping your elbows close to your sides. Draw shoulder blades together at the top of the exercise.

Down Phase
Slowly lower bar to starting position.

5. Bench dips on Swiss ball
Starting position
Place hands no more than shoulder width apart on the bench. Do not lock elbows. Place feet on a small Swiss ball.

Down-phase
Slowly lower your body until your arms are parallel with the floor. Keep your back straight and close to the bench during the down phase.

Up-phase
Return to starting position without locking elbows

Good Luck
RL Bodytrainer
Personal Training Clifton

Monday, December 5, 2011

Plyometric Training for Speed and Power


Without really knowing it, you will have probably preformed plyometrics during a sporting situation, group fitness class or gym based workout. Plyometric training was first known as ‘jump training’ and was first used by eastern European athletes during the 70’s. The American field and track coach Fed Wilt first used the term plyometrics in 1975. Over the years plyometric training has quickly become an essential part of explosive speed and power training by athletes worldwide.

Plyometric exercises enable the muscle to reach maximum strength in the shortest amount of time, this action is also known as power. Athlete power directly affects an individual’s ability to jump, change direction and sprint, fundamental components of most sports. The basic physiological mechanism targeted by plyometric training is known as ‘the stretch-shorten cycle’. There are two important factors affecting the stretch-shorten cycle, elasticity and stretch reflex of a muscle. The elasticity of a muscle is important during the eccentric phase ( leg muscles lengthen before jump). As a muscle rapidly lengthens, energy is stored in the elastic components of the muscle (tendons and cross-bridging of the muscle fibers), which then can be added to the concentric phase (pushing off during jump). The stretch reflex mechanism is seen during the knee tap test preformed by doctors. When a tendon is rapidly stretched, the stretch reflex mechanism will cause the attached muscle to contract with equal force. It is very important that there is little delay between the action of the stretch shorten cycle and the concentric phase of the movement. If the time delay between eccentric and concentric phase of a plyometric exercise is too long the stretch-shorten cycle will not help produce extra power. When performing plyometric exercise keep contact time with the ground as short as possible.

There are a number safety and technique concerns needed to address when performing plyometric exercises. Safety concerns such as warm-up; footwear, exercise surface and level of intensity.

Plyometric training places great stress on the joints, tendons and muscles. The rapid change between the eccentric loading of the muscles and the concentric phase of the movement produces great force. With this in mind always warm-up and perform specific stretches before commencing plyometrics. The best way this can be achieved is by performing 5-10 minutes of low intensity cardiovascular exercise (jogging, skipping or stationary bike). Stretching should be preformed in a dynamic fashion. Dynamic stretching drills are simply, stretching with movement.

You may have seen sprinters skipping or marching down a track before a race or training, these are example of dynamic warm-up drills used before plyometric training. Do not perform long duration static stretches, this will only tone down the stretch-shorten cycle and will hamper your muscles ability to produce force quickly. To prevent injury always wear supportive footwear during training. Stay away from running shoes with too much shock absorption. Forces need too be transferred quickly between the eccentric and concentric phase, running shoes are designed to slow this force and will decrease the effectiveness of the training. Make sure the surface you are training on is even with no obstacles that can cause injury. The harder the training surface the greater the force will be transferred though the stretch-shorten cycle. If the surface is too hard (concrete or hard-wood) there is an increased chance of injury.

 Limit the amount of time-spent training on this type of surface. Plyometrics exercises place great stress on the body. Because of the high intensity nature of this training always seek help from a qualified instructor, coach or personal training when designing a programme. For more information on plyometrics there are many books, video’s and dvd’s dedicated style of training. The internet is always a great source of information, simply do a search on www.google.co.nz.

Performing the exercises.

Before commencing plyometrics seek clearance from a medical practitioner. A six-week conditioning programme designed by a qualified instructor should be completed before commencing this any of these exercises. If you have are carrying any injuries or excess body fat check with a qualified instructor before commencing any plyometric style exercise.

The following exercises are not to be used as a finished programme, merely as an addition to an individual existing exercise programme. Replace an existing exercises with a corresponding plyometric exercise listed below.

Make sure you are using supportive footwear and the training surface is even and clear of obstacles. . A warm-up of 5-10 min cardio should be completed at the start of the workout. The first 2 sets of plyometrics should be preformed at 50-75% intensity.


5-5-5 squat jumps 2-3 10-15 60s
Single leg side to side jump with a vertical squat jump 2-3 10-15 60s
Power drop 2-3 10-15 60s
Plyometric Reverse crunches 2-3 10-15 60s


The Exercises
Do not hold your breath, breath out on exertion. Select a load suitable for the rep range. Maintain technique throughout exercise, once you lose your technique stop!

1. 5-5-5 squat jumps

This is a great exercise for improving an individual’s vertical jump. 5-5-5 squats also tone the lower limbs (hips and thighs) without bulking muscles, which sometimes occur with heavy traditional squats. Great for sports such as: netball, basketball, volleyball and skiing.

Starting position
Stand with feet shoulder width apart. For increased load depending fitness level hold a 2-6kg medicine ball close to your chest. Keep eyes on the horizon, abdominals strong and the chest up throughout the movement.

Technique
Move with hips first then knees. Squat as if sitting into a chair, keeping the abdominals strong. Stop decent if the heels start to rise or the pelvis tilts backward. Stop when the thighs are parallel to floor.

Action
Perform 5 slow controlled squats while keeping the ball on your chest. Next, perform 5 drops squats by dropping quickly in the down phase and rising slowly in the up phase. Last, perform 5 explosive squat down and up phase fast. As you explode in the up phase drive the medicine ball as high as you can without letting it go.

2. Single leg side to side jump with a vertical squat jump

The ability to change direction quickly is needed in many sports. This exercise is designed to a produce explosive change in direction. With a focus on the abductors (outside thighs) it also has a great toning affect. Great for sports such as: Netball, basketball, volleyball soccer and rugby.

Starting position
Start in a vertical position on one foot with knees slightly bent. Use a pole or line to jump across.

Action
Jump laterally over the line or pole landing on the opposite foot. As you land jump explosively in a vertical direction. Repeat exercise in the opposite direction until rep range is reached.

3. Power drop

This is a partner-assisted exercise. The focus of this exercise is to increase explosive power of the chest, shoulders and triceps. Great for sports such as: netball, basketball, tennis and boxing.

Starting position
Lie in a supine on the ground with arm raised above your chest. Your partner stands on a box with medicine ball in outstretched arms.

Action
When the partner drops the ball catch it and propel it back to the partner in an explosive manner.

4. Plyometric Reverse crunches

You will need an exercise partner to complete this exercise. The focus of this exercise is to increase an individual’s ability to produce directional change using the abdominals. Many abdominals are performing in a slow and controlled manner, which is great for tone and shape but does little for functionality needed for sport. If you find traditional abdominal exercises no long produce a training affect try this high intensity exercise.

Starting position
Lie in a supine position on the ground. Have your partner stand above your head with feet shoulder width apart by your ears. Grip tightly around your partner’s ankle, be careful not to pull your partner over when performing this exercise. Raise your legs straight up toward your partner’s hands.

Action
As you raise your legs towards your partner she/he should push your legs away toward the ground. Resist this move and more raises your legs quickly to the starting position. Repeat until exercise rep range is reached.

Personal Trainer
M: 07511468490
E: rlbodytrainer@gmail.com
Twitter: @LesmillsPT

Thursday, November 10, 2011

Core conditioning

personal training clifton
Over the years, gym based training has had a major re-think. The major training philosophy in the past originated from the bodybuilding world. The focus was directed towards an ideal symmetry and increasing the muscular size of an individual without any attention to posture, muscle-balance or injury prevention. Today the human body is not seen just as a reflection in the mirror but more as a functional instrument with the need for constant maintenance focusing on balance, stability and specificity of movement. Core conditioning encapsulates all of these principles and is the starting point for any programme designed to increase an individual’s functionality.

The key areas involved in core conditioning and functionality are, firstly, the inner core and how it improves function and secondly, integrating a strong core with the rest of the body during movement.

A strong inner core should have two main functions; To help produce and hold a neutral lower spine position and protect the lower trunk from injury during everyday movement. Neutral lower spine position is considered the position at which the lower (lumbar) spine and pelvis are best aligned to transmit forces thru the trunk. At this position the structures of the lower back and pelvis can receive and transmit force from the rest of the body with a decreased risk of injury. Activating the inner core will help produce a neutral spine position. There are four parts to the inner core and the best way to visualize its structure is to use a cylindrical model. The top of the cylinder represents the diaphragm, the front and sides represents transverses abdominis muscles, the back represents the multifidus muscles and the base represents the pelvic floor muscles. Activating all four groups in a coordinated manner will not only help produce neutral spine but also form a strong girdle like structure around the lower back. Without this girdle in place, the lower spine and joints are at great risk of injury from forces caused by unusual or high-risk movement patterns (i.e., rotation and flexing at the same time). When the inner core is strong, forces from the limbs can transmit more effectively throughout the body. From sporting situations to everyday physical tasks ability to produce powerful integrated movements safely all starts with functional inner core. Imagine a crane with one weak section: it doesn’t matter how strong the rest of the structures are, its ability to lift is always limited by its weakest link.

An important factor that is often missed is the integration of the core has with the rest of the body. Not only must the inner core interact with the structures of the thorax (hips, shoulders and neck) but these structures must also interact with the upper and lower limbs. A strong linkage between these structures is paramount. We move in a multidimensional world and human movement will produce forces that will to travel away and towards the center of the body. When you first decide to start an exercise programme it is essential to seek help from a qualified instructor or personal trainer to teach you the basics like neutral spine posture and switching on your inner core. Many gyms now run programmes focusing on core conditioning. Les mills have a 12-week programme dedicated to helping an individual progress from a beginner level to advance core training. Like a house the human body needs strong foundations, when you first start training it is important to focus on inner core. When you gain control over your inner core change your programme to integrate the total body. Exercises should then involve the upper and lower limbs in a coordinated manner, mimicking movement used in everyday life. If you try a more advanced exercise and cannot maintain neutral spine and inner core activation, take a step back. Your nervous system will learn faster with correct posture and core activation. Slowly increase the difficulty of exercises as you gain control over your body.


The Exercise Programme

Before commencing any of these exercises, seek clearance from a medical practitioner. The following examples are advanced core exercises. You will need a strong core to attempt the following exercises. If you want to start training your core or need to improve your cores functionality, seek help from a qualified instructor or personal trainer.

The following exercises can be used in addition to an individual existing exercise programme. Try 1 or 2 of the following exercises after a 5-10 min warm-up.

Sets Reps/ time Rest
Double Swiss-ball roll out 2-3 1-10 60s
Pole Bridge 2-3 1-10 60s
Inner unit leg switch 2-3 1-10 60s
Swiss-ball side twists 2-3 1-15 60s
S/ball m/ball bridges 2-3 10-20s 60s

Do not hold your breath, breathe out on exertion. Maintain a neutral spine position and switch on your inner core on before starting exercises. Maintain technique throughout exercise, once you lose your technique -stop! Make sure you perform all exercises in a cleared area with no chance of contacting objects during falls.
The exercises

Double Swiss-ball roll out

This is an extremely advanced exercise that will place great demands on balance and inner core strength. This exercise highlights the need to have a strong integration between the inner core and the thorax muscles, which in turn, are linked to our legs and arms. Mastering this exercise indicates great control over one’s body.

Starting position
Place two equally sized Swiss-balls one diametre apart. Mount one ball in the kneeling position. Slowly place your hands on the other ball forming a horse stance position. Roll both balls apart so you can start in a kneeling bridge position. Make sure your forearms and lower legs are in contact with the S/balls. Maintain a neutral back and neck position at all times.

Finishing position
Roll both S/balls apart while maintaining a neutral back and neck position. When you start to lose technique or strength, roll both S/ball’s together to the starting position. Only repeat reps while maintaining the correct form.

Pole Bridge

This exercise is an advanced version of a rollout exercise. It will place great demands on inner core and upper body strength. Increasing the starting distance of your knees to the pole will increase difficulty.

Starting position
Start with knees shoulder width apart. Maintain a neutral spine and neck position throughout entire movement. The pole should be about one and a half metres away from your knees. Start with one hand above the other just above your head height.

Finishing position
While maintaining a neutral back and head position, slowly place one hand below the next. When you begin to lose neutral spine position return to the starting position by placing one hand above the other. Repeat steps while correct technique is preformed.

Inner unit leg switch

Inner unit exercises are one of the foundation exercises used for improving inner core function. Performing the exercise with straight leg switch places great demands on the inner core. Before attempting this exercise the individual must have mastered lower level inner unit exercises. Failure to do this will result in the use of the superficial muscles (rectus abdominis) and the focus of the exercise will be lost.

Starting position
In the supine position place both feet shoulder width apart on the floor. Begin with the spine and neck in a neutral position. Next, activate your inner core by shortening the distances between your navel and tailbone. Maintain breathing while performing the exercise. Lift your right leg up close to 90 degrees and your left leg 30 centimetres of the ground. If you lose control of your core at this stage try doing a lower level inner core exercise to build up control.

Finishing position
Keep your inner core switched on throughout the entire exercise. Slowly alternate legs into opposite positions. If you lose control of inner core or technique, stop the set and rest until next.

Swiss-ball side twists

This exercise focuses on rotation of the torso that is often left out in exercise programmes. This is a great exercise for sports involving rotation such as rugby, netball and tennis.

Starting position

From a sitting position slowly roll down the S/ball while maintaining a neutral spine and neck. Grip the medicine ball with both hands and raise it above your chest.

Finishing position

Slowly lower the m/ball to the right side while keeping eye contact with the m/ball at all times. Make sure you keep your hips level and your feet in contact with the ground throughout entire exercise. If you lose technique or the m/ball reaches the horizon return m/ball to the starting position and then repeat on the left side.


Swiss-ball and medicine ball bridges

This is an advanced version of a bridge style exercise. The nature of the exercise places great demands on balance and inner core strength.

Starting position

Place a medicine ball two meters away from a swiss ball. Roll out over the S/ball until the m/ball is directly under your shoulders. Maintain neutral spine and neck position throughout the entire movement. Place your strongest hand one top of the m/ball one hand width to the side. In an explosive motion, snap your other hand onto the opposing side.

Finishing position

Focus on maintaining a neutral spine and neck while balancing in this position. Try to build your time spent balancing.

Personal Trainer
M: 07511468490
E: rlbodytrainer@gmail.com
Twitter: @LesmillsPT